How Can We Help?
Creating New Shifts
New shifts can be created in a number of ways. You can click and drag your mouse across any cell, double click a cell, or utilize the “Copy Shift” or “Copy Day” feature.
Create a New Shift by clicking and dragging the mouse in Day View.
Clicking and dragging your mouse across a specific time range in the Day View will populate the shift editor with the highlighted time.
Create a New Shift by double clicking.
Copying Shifts
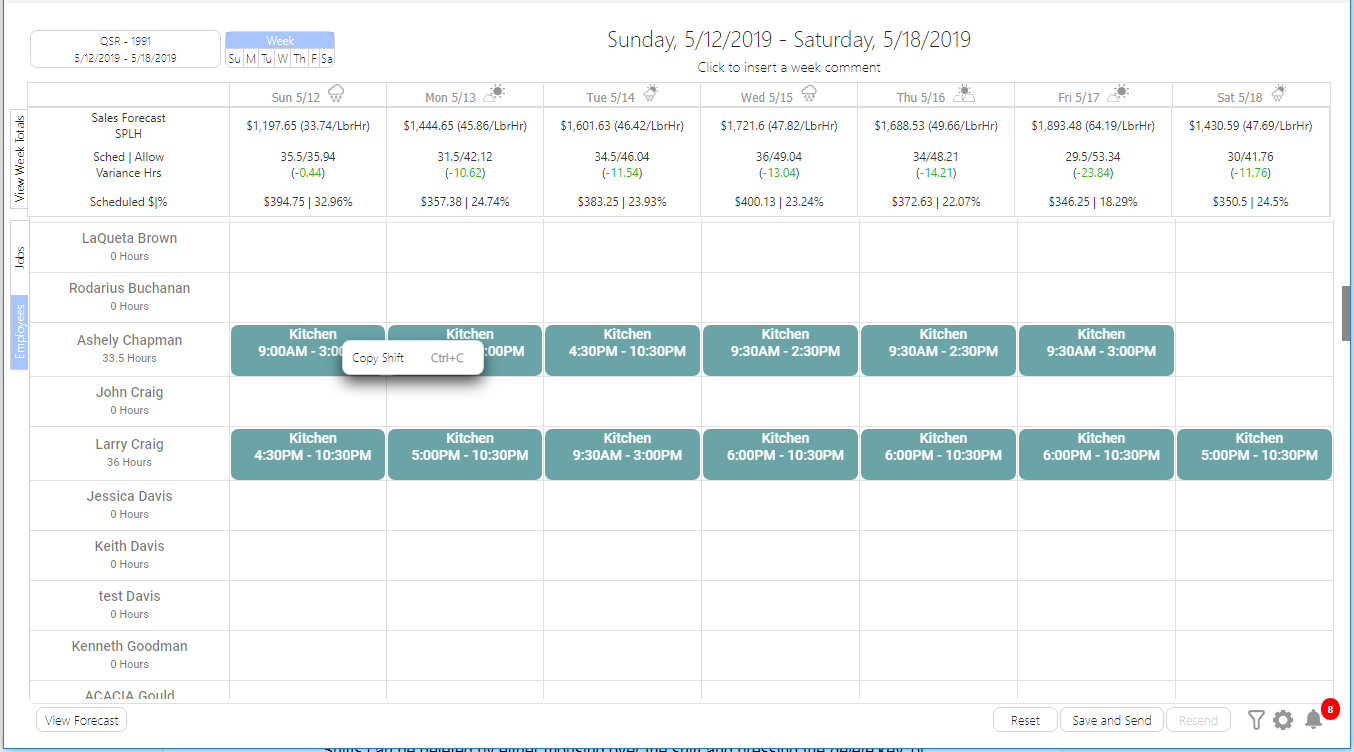
Copying and pasting can be accomplished with the right-click context menu, or by simply hovering over a shift and using the keyboard shortcut combination Ctrl + C, and then hovering over any date cell and using the keyboard shortcut combination Ctrl + V. A copied shift can be pasted an indefinite number of times in any view.
To COPY a shift, right-click it and select Copy or hover over it and use Ctrl + C.
Copying Day
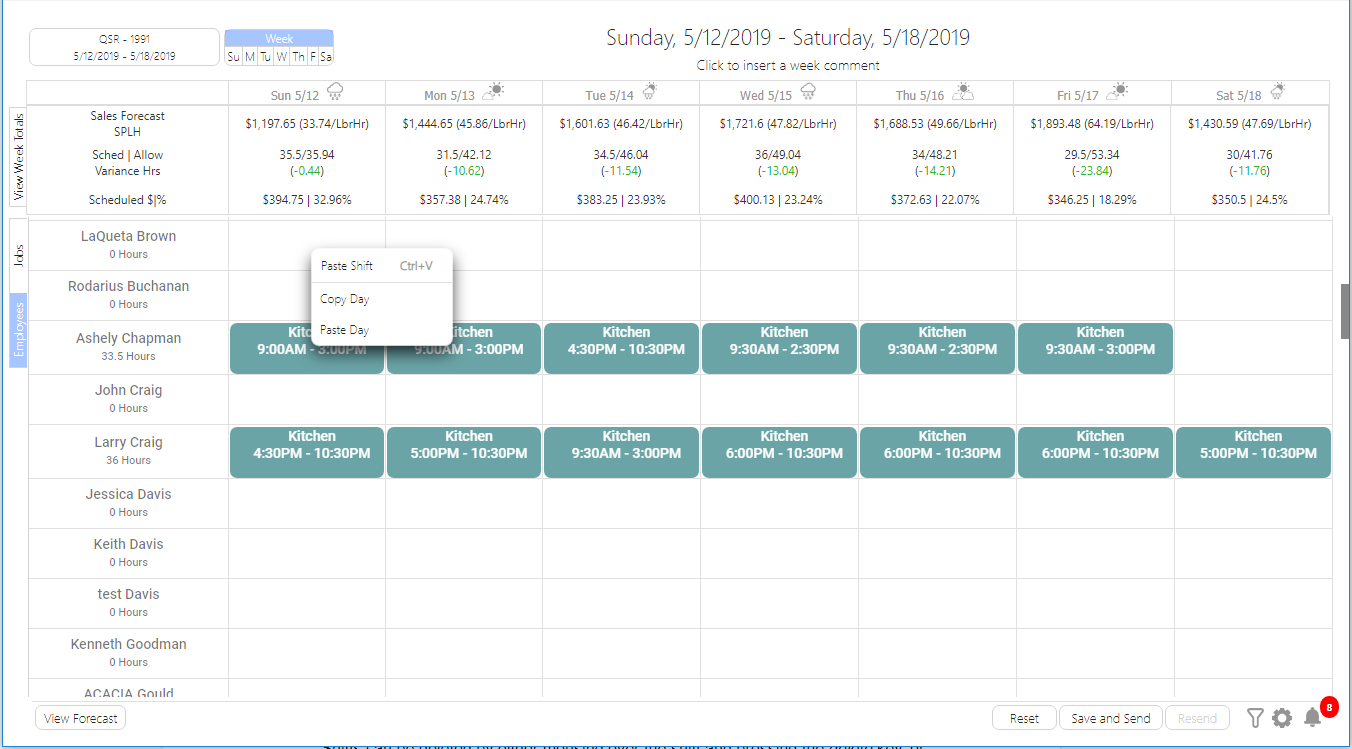
All the shifts in a selected day can be copied to other days by using the right-click context menu options to Copy Day and Paste Day.
Right clicking an empty cell reveals the context menu, allowing you to Paste Shift, Copy Day, or Paste Day.
Edit Shift Window
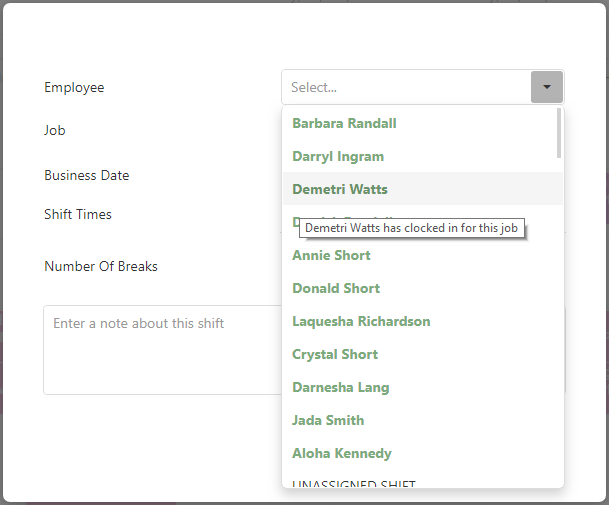
The Employee dropdown will display employees in either green or gray. Green indicates an employee has worked the selected job in the past. Hovering over the text will also tell you if the employee has worked the selected job before.
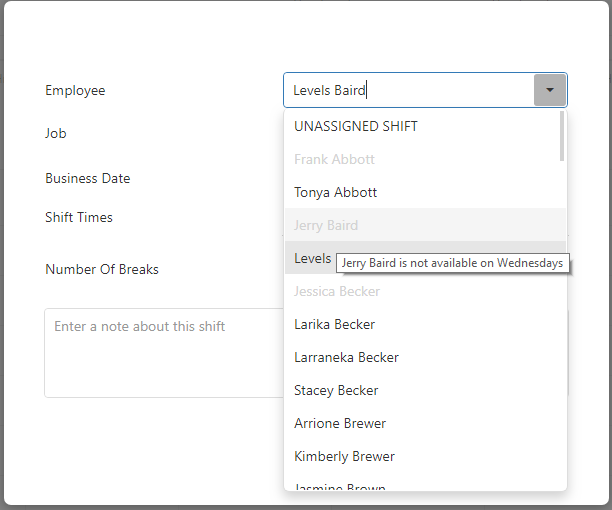
Gray indicates an employee with an availability conflict for the selected day. Hovering over a gray employee name reveals the employee availability for the day. They can still be selected, but it gives you a visual indicator that the shift may cause an availability conflict.
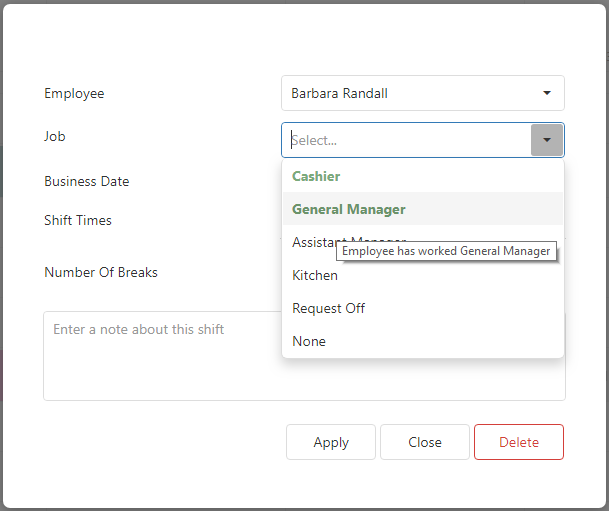
The Job dropdown will display recommended jobs for the selected employee in green text at the top of the dropdown list. Hovering over the job description will show that the employee has clocked in for that particular job.
The business date is determined by where you clicked when you created the shift, so you will not be able to create shifts that are outside the viewable week.
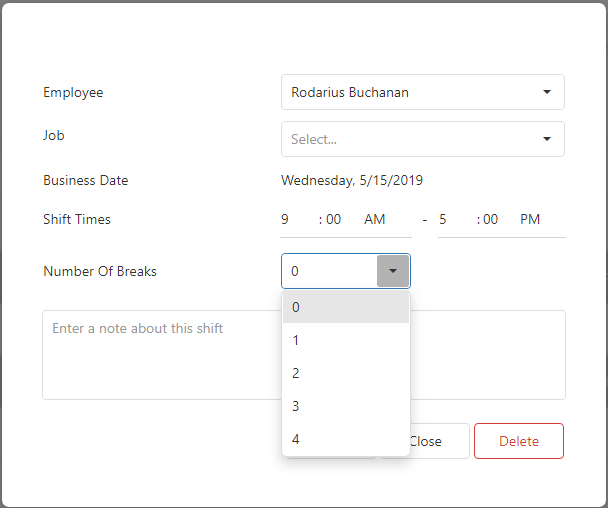
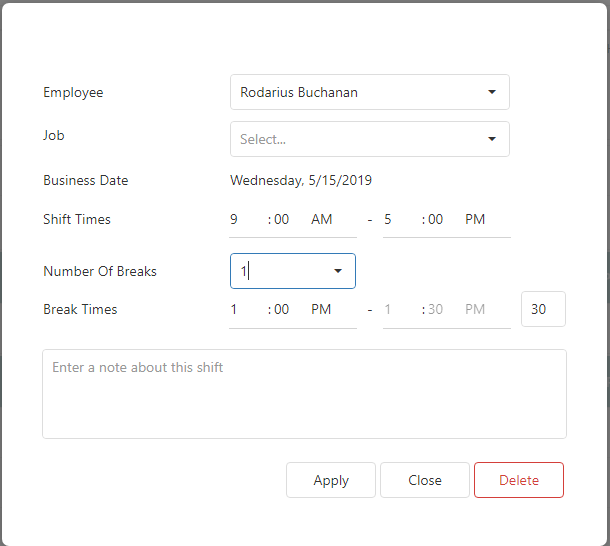
When you create a new shift, you will see an editor that allows you to select the number of breaks that should be included with the shift. After selecting a number from the dropdown, a corresponding number of break editing controls will become visible. The start and end times of the breaks are calculated to disperse as evenly as possible throughout the shift, but can be edited along with the break lengths.
A new shift will allow you to select the number of breaks between 0 and 4.
After selecting the number of breaks, additional break controls will appear.
Double click to re-open a shift. The shift editor window will pop-up allowing you to make adjustments as needed.
Deleting Shifts
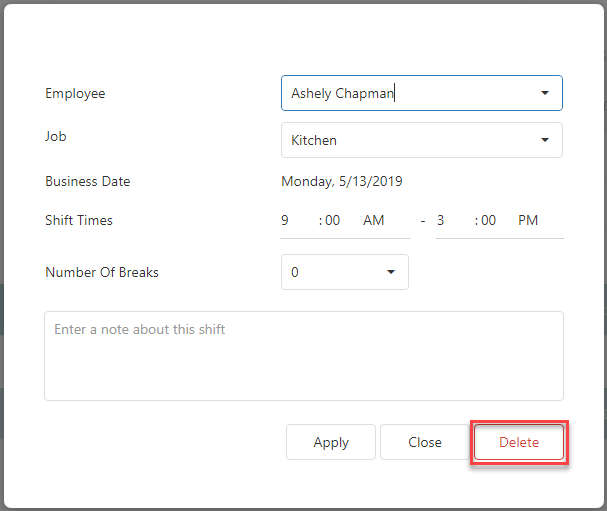
Shifts can be deleted by either hovering over the shift and pressing the delete key on your keyboard, or opening the shift and clicking the delete button.
Once your schedule is built, don’t forget to click the Save button. Once the schedule and Schedule Alerts are reviewed, click the “Post” button to Send Schedules to Employees .