
How Can We Help?
Scheduler Tour
QSROnline’s Scheduler provides managers with a proactive scheduling process that includes forecasting sales for upcoming weeks, helping to ensure that labor goals are met. This guide reviews the layout of the Scheduler for easy access to its many features.
Accessing The Scheduler

To access your QSROnline account, go to my.qsronline.com. Sign in with your QSROnline username and password.
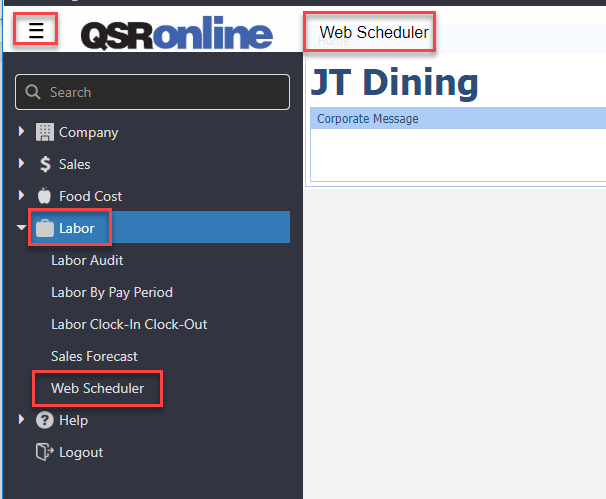
Click Web Scheduler in the quick links at the top of the screen, or go to Menu, down to Labor, then Web Scheduler. The search bar in the Menu can be used to quickly find and select the Web Scheduler link.
Tutorial
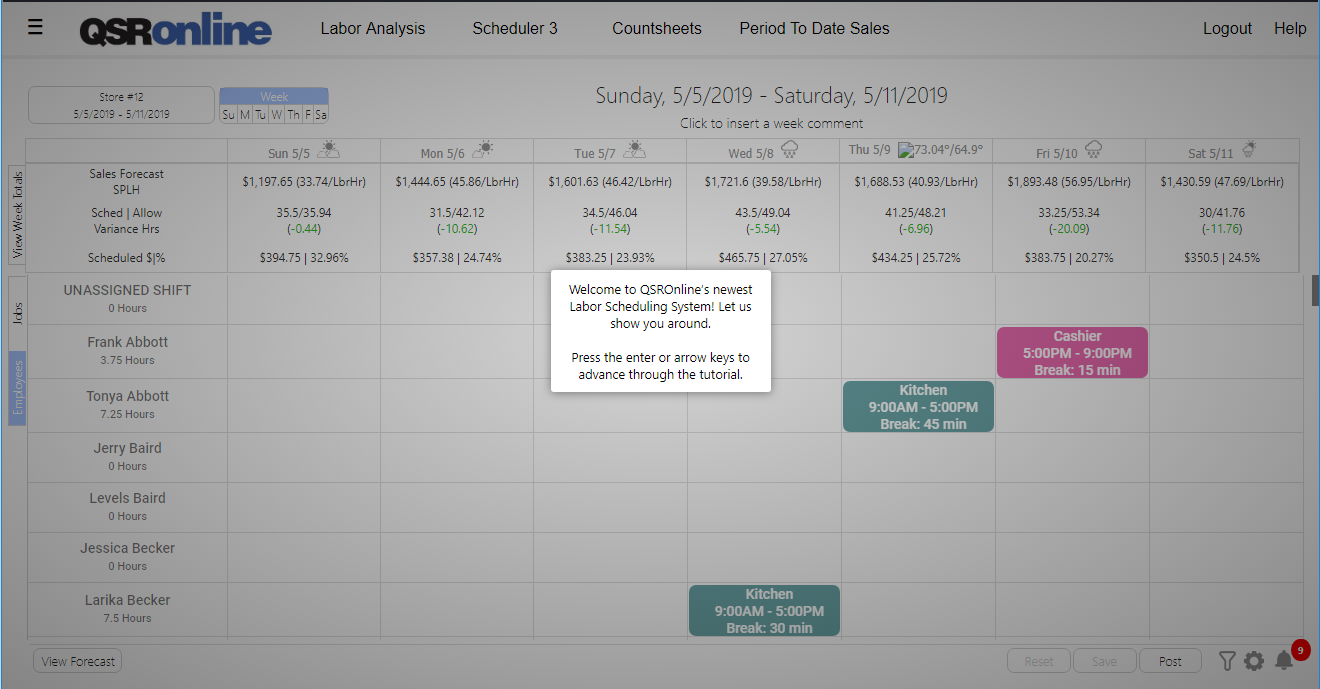
During initial access the Scheduler, a new user tutorial will begin. Use the enter or right arrow key on your keyboard to navigate through the different sections.
Help
The Help button on the upper right hand corner allows the following options:
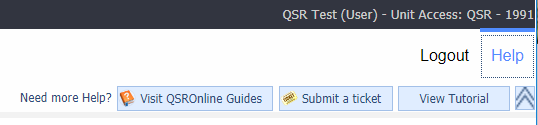
- Visit QSROnline Guides – This is a quick link to access this website from within my.qsronline.com (support.qsronline.com).
- Submit a Ticket – This button takes you to a form to quickly submit a ticket directly to QSROnline Support.
- View Tutorial – View the Tutorial again if needed. Remember to use the enter or the right arrow key on your keyboard to advance the Tutorial.
Scheduler General Layout
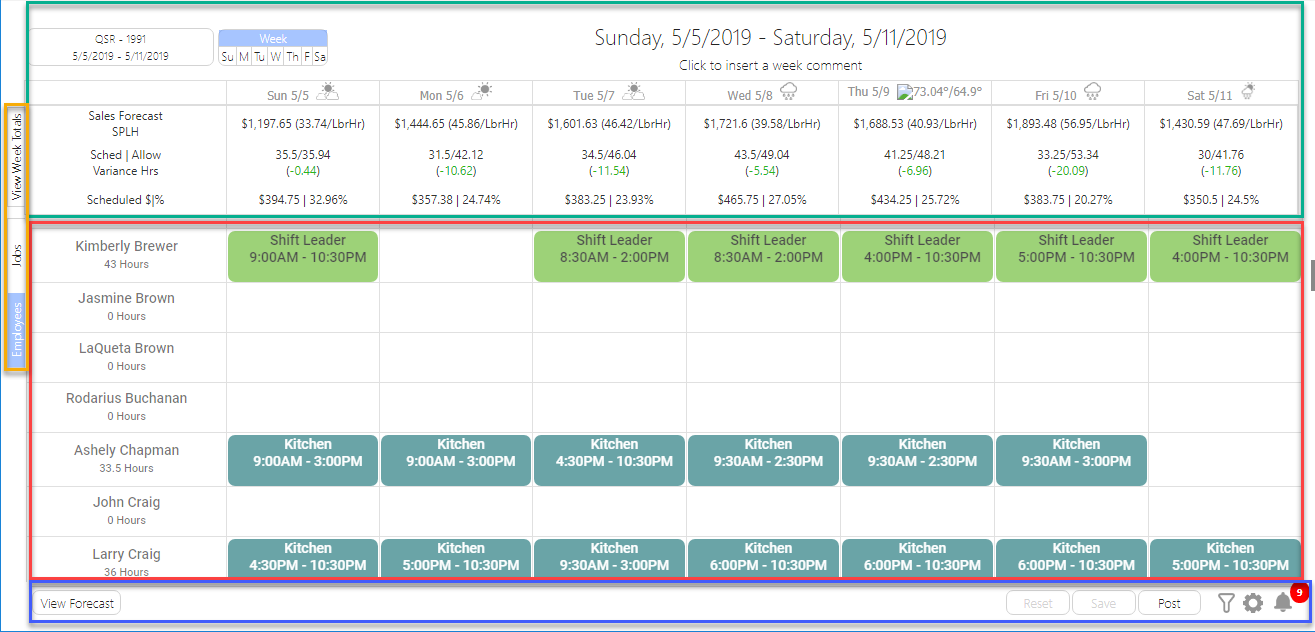
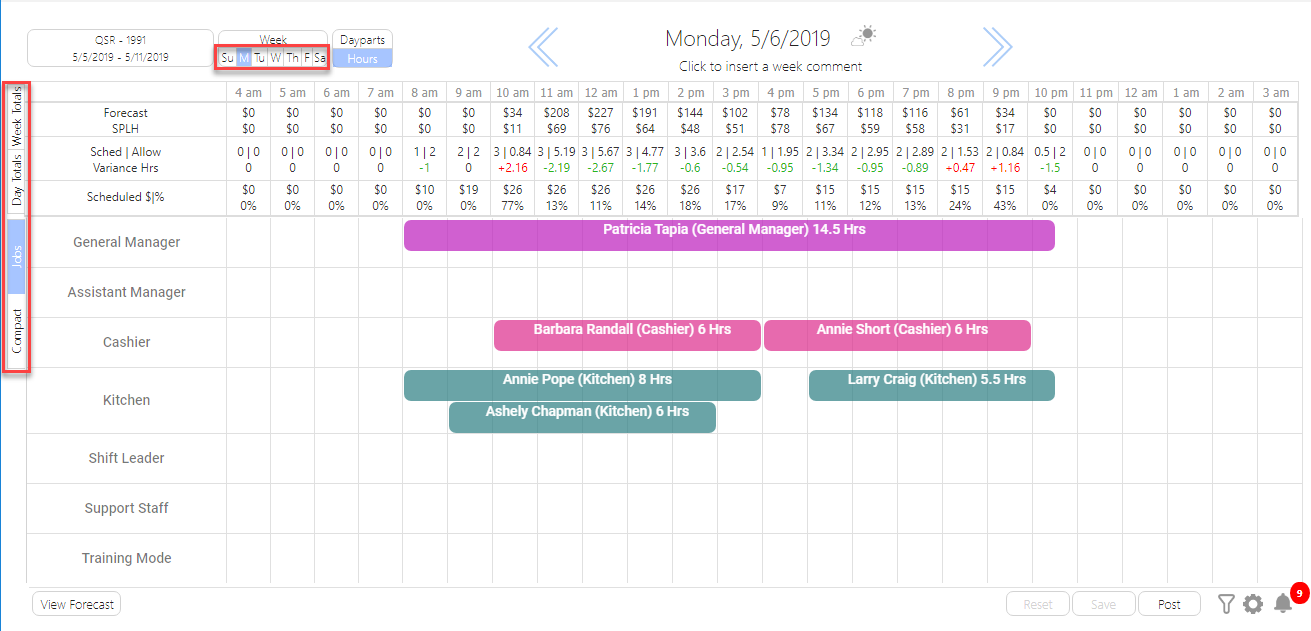
QSROnline’s Scheduler has five zones: the header/metrics grid (outlined in green), side tabs (outlined in orange), scheduler editor (outlined in red), and the footer (outlined in blue).
Header Options
QSROnline’s Scheduler has a header that contains the following options. For details on the Header Toolbar Options, refer to the Header Options guide.

- Unit/Week Selector – Administrators can use the unit selector to switch between each location’s schedule. This functionality allows you to choose the store and week you would like to view or build a schedule for.
- Schedule Views – The Scheduler allows you to view the schedule in the schedule editor by Week or Day. Most scheduling managers will build their schedule initially in the week view, then refine their schedule with the day part and hourly metrics available in the day view. For details on Schedule Views, refer to Web Scheduler Views guide.
- Week View – Allows you to view the schedule for the selected Week using the following groupings:
- Group by Employee
- Group by Job
- Week View – Allows you to view the schedule for the selected Week using the following groupings:
-
- Day View – Allows you to view the schedule for the selected Day using the following groupings:
- Group by Job
- Compact
- Day View – Allows you to view the schedule for the selected Day using the following groupings:
- Weather
- Week View – In the Week view, the weather icons are displayed by each of the day/date labels at the top of the sales grid. Hovering over the icon will display the high/low temperatures for that day. Clicking the icon will open a pop-up window that displays the weather for the week.
-
- Day View – In the Day view, the weather is displayed to the right of the day/date labels, and when clicked, displays the weather information for the day that is currently loaded.
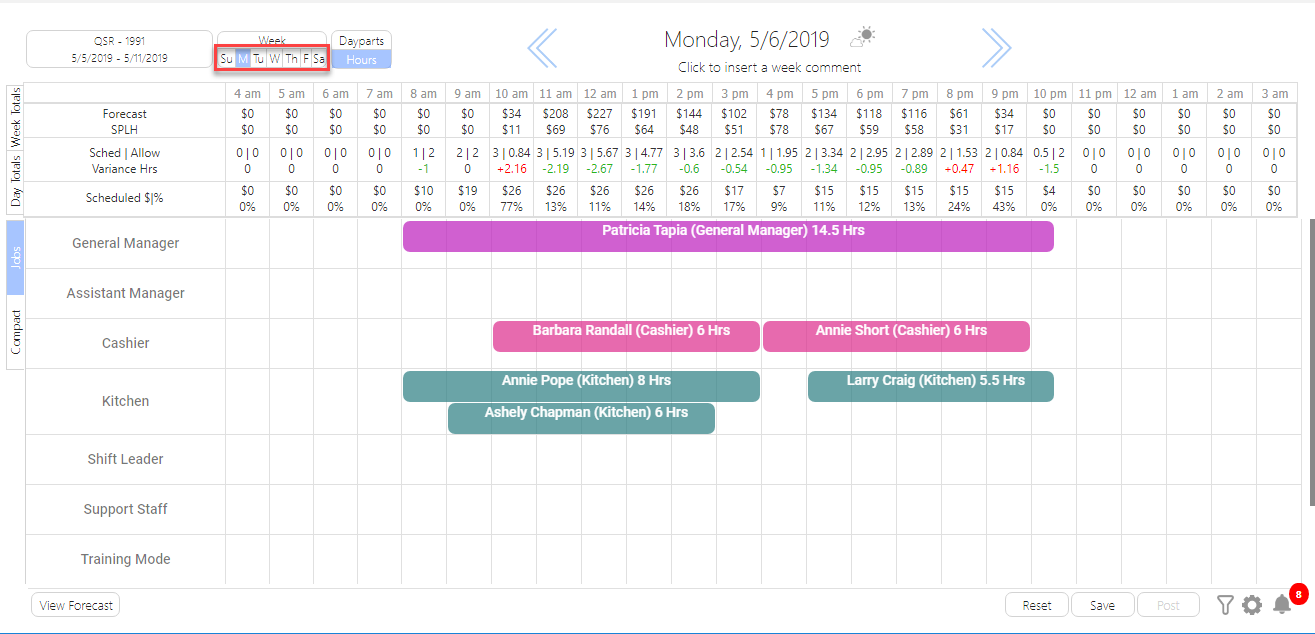
Metrics Grid
Depending on the view you are in, view key metric totals by day, daypart or hourly. The grid is responsive; as schedule adjustments are made the grid automatically updates with the new totals.
-
- Sales Forecast | SPLH – The Sales Forecast appears on the top row and the Sales Per Labor Hour, or scheduled hours, on the bottom row.
- Sched | Allowed | Variance Hrs – The total Scheduled Hours appear on the top row along with the Allowed Hours, and the color-coded Variance between allowed hours and scheduled hours appears in parenthesis on the bottom row.
- Schedule $|% – The Scheduled labor dollars and percent for the day.
Each view has a View Week Total tab in the Side Tabs to the left of the metrics grid. For details see the Side Tab Options guide.
Side Tab Options
These buttons are located to the left of the metric grid and schedule editor. They allow you to change the grouping of the employees within the schedule editor and view the sales totals within the sales grid. For details on the Side Tab Options, refer to Side Tab Options guide.
- Week View
- View Week Totals
- Jobs
- Employees

- Day View
-
- View Week Totals
- Day Totals
- Jobs
- Compact
-
Schedule Editor
For details on how to build a schedule, see the Building Schedules guide discussed in the next article.
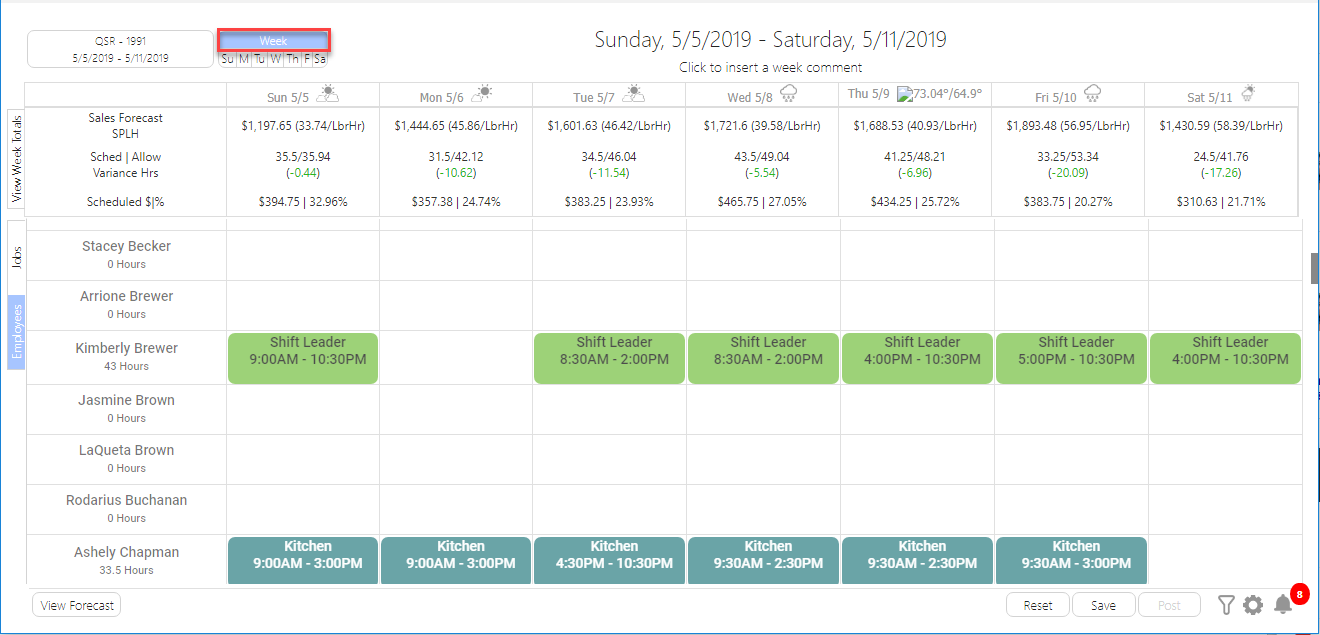
- Week View – Shows shifts by employee (sorted alphabetically by the last name) for an entire work week. To change to the day view, either click on the abbreviated day of the week in the header section, or simply click on the date in the sales grid to go to that particular day.
- Day View – Shows shifts by time for a single business day. To return to the week view, click the “Week” button in the header.
Footer
In the Scheduler footer, there are the following buttons: View Forecast, Options, Reset, Save and Send and Alerts. For details on the Footer Options, refer to the Footer Options guide

- View Forecast – This button allows you to view/edit the Sales Forecast for the selected week. For details on setting your sales forecast, see the Sales Forecast guide.
- Reset – This button allows you to reset the schedule to the last saved version, effectively discarding all unsaved changes. The Reset button is only enabled when there are unsaved changes and will alert you with a pop-up prompt that continuing will cause you to lose your changes.
- Save – This button allows you to save your schedule changes. The Save button will is only enabled if there are unsaved changes.
- Post – This button allows you to post a saved, unposted schedule, which sends each scheduled employee their schedule details as either a text message or email, and makes the schedule visible on the QSROnline Scheduling App.
- Filter – This will open the filter pop-up, which allows you to select from multiple filtering options – Jobs, Job Classifications, Employees and Scheduled Employees.
- Schedule Options
- Copy From – Once you have created your first few schedules, you can lighten your workload by copying a previous schedule. No need to build a brand new schedule from scratch each week! See the Copying an Older Schedule Guide for more details.
- View History – Allows you to view each saved version of the schedule, and each version is date and time stamped by user. This is a great tool for accountability. See who made changes in the Schedule and what those changes are. See the Schedule History Guide for more details.
- Edit Schedule Settings – This will open the Schedule Settings pop-up where you can change the schedule settings listed below.
- Edit Job Settings – This will open the Job Settings Editor, where the sort order, visibility, classification and color of the available job codes can be edited.
- Show/Hide Details Tooltip – Allows you to Show/Hide the Details within the Schedule Editor when hovering over any shift.
- Edit Company Allowed Hours – Allows you to edit the Allowed Hours at a company level for all locations. This feature is only selectable for Administrator users. See the Scheduler Allowed Hours Setup guide.
- Edit Store Allowed Hours – Allows you to edit the Allowed Hours at the store level for each location.
- Edit Employee Availability – Allows you to set employee availability days and times in the Web Scheduler to avoid scheduling conflicts. By default, ALL employees will be labeled as “available” to work at ALL times unless the employee availability is set within the Web Scheduler.
- Edit Delivery Setting – Schedules can be emailed, texted, and sent to employees via the QSROnline Scheduling App as a push notification. For more details, review the Send Schedules to Employees guide.
- Print Day – Allows you to print the schedule for the selected day. This feature is only available to select when viewing the schedule by Day view.
- Print Daily Roster – Allows you to the print the daily roster for the selected day. This feature is only available to select when viewing the schedule by Day view.
- Print Week – Allows you to print the schedule for the selected week.
- Schedule Alerts – This will open the schedule alerts pop-up, where various alerts can be viewed. For more details review the Schedule Alerts guide.
For assistance building schedules, see the Building Schedules guide.